Appendix E - High resolution figures showing the study areas for each Package and the A96 Full Dualling
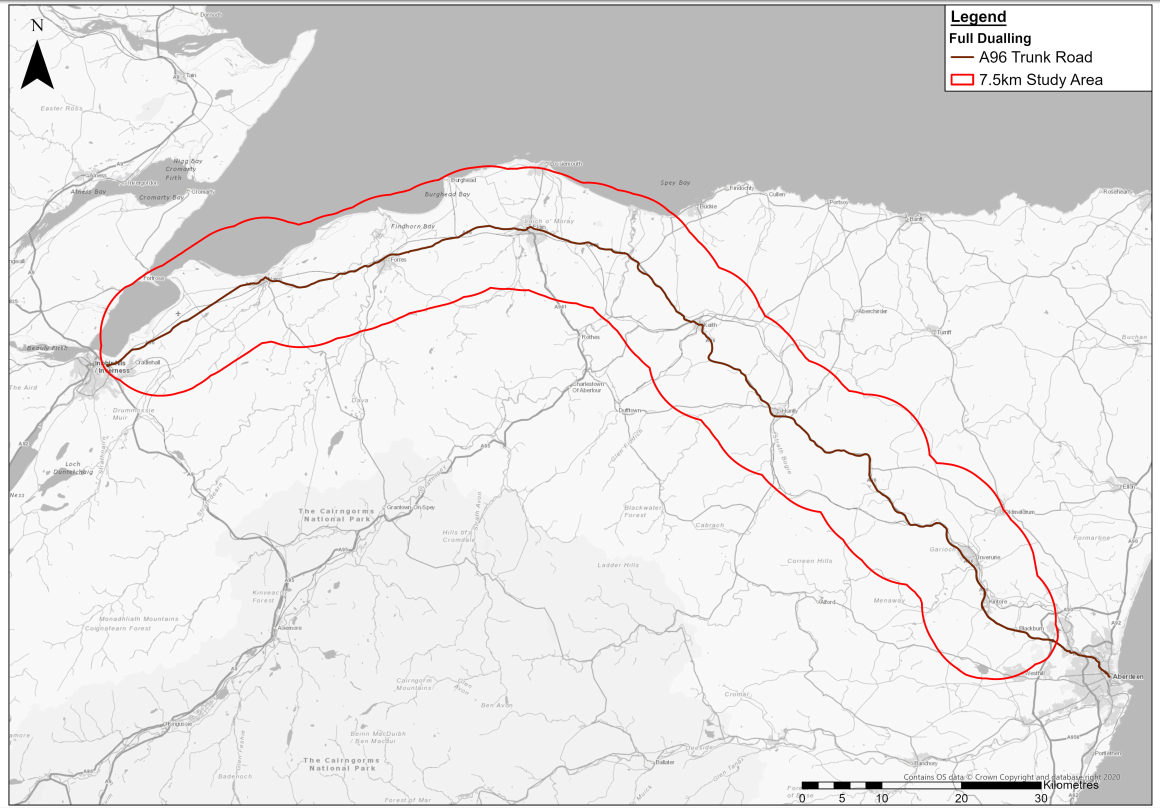
A96 Full Dualling
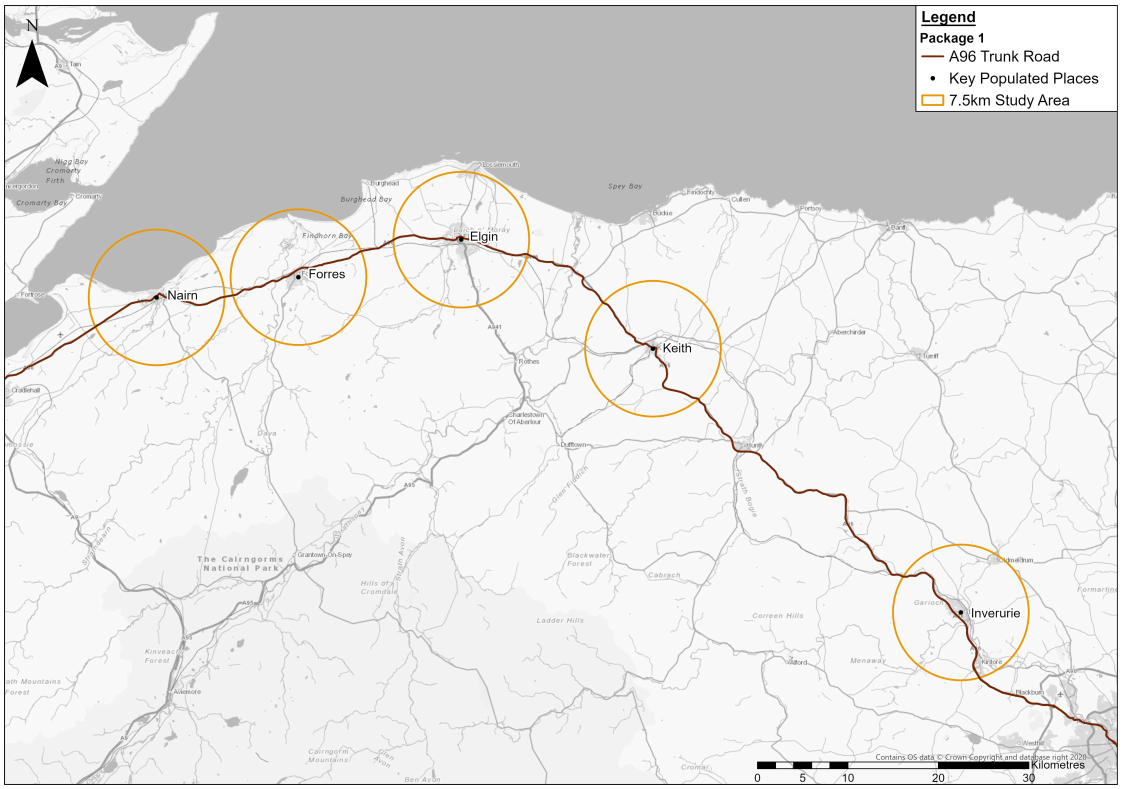
Package 1
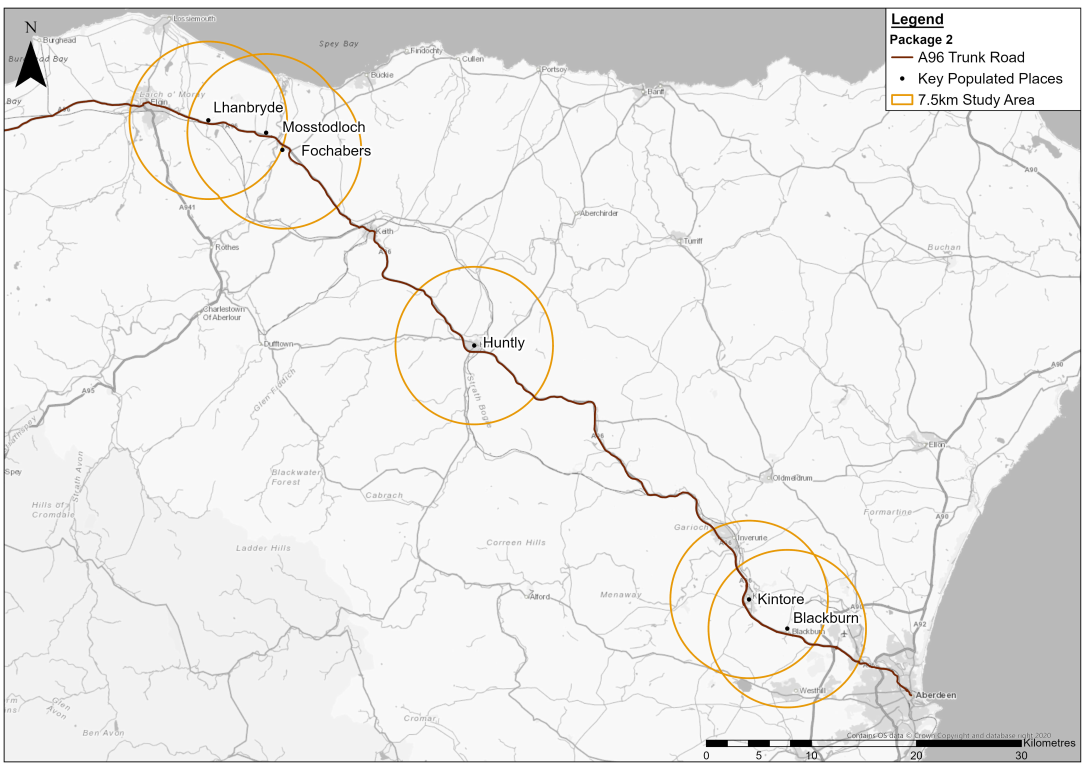
Package 2
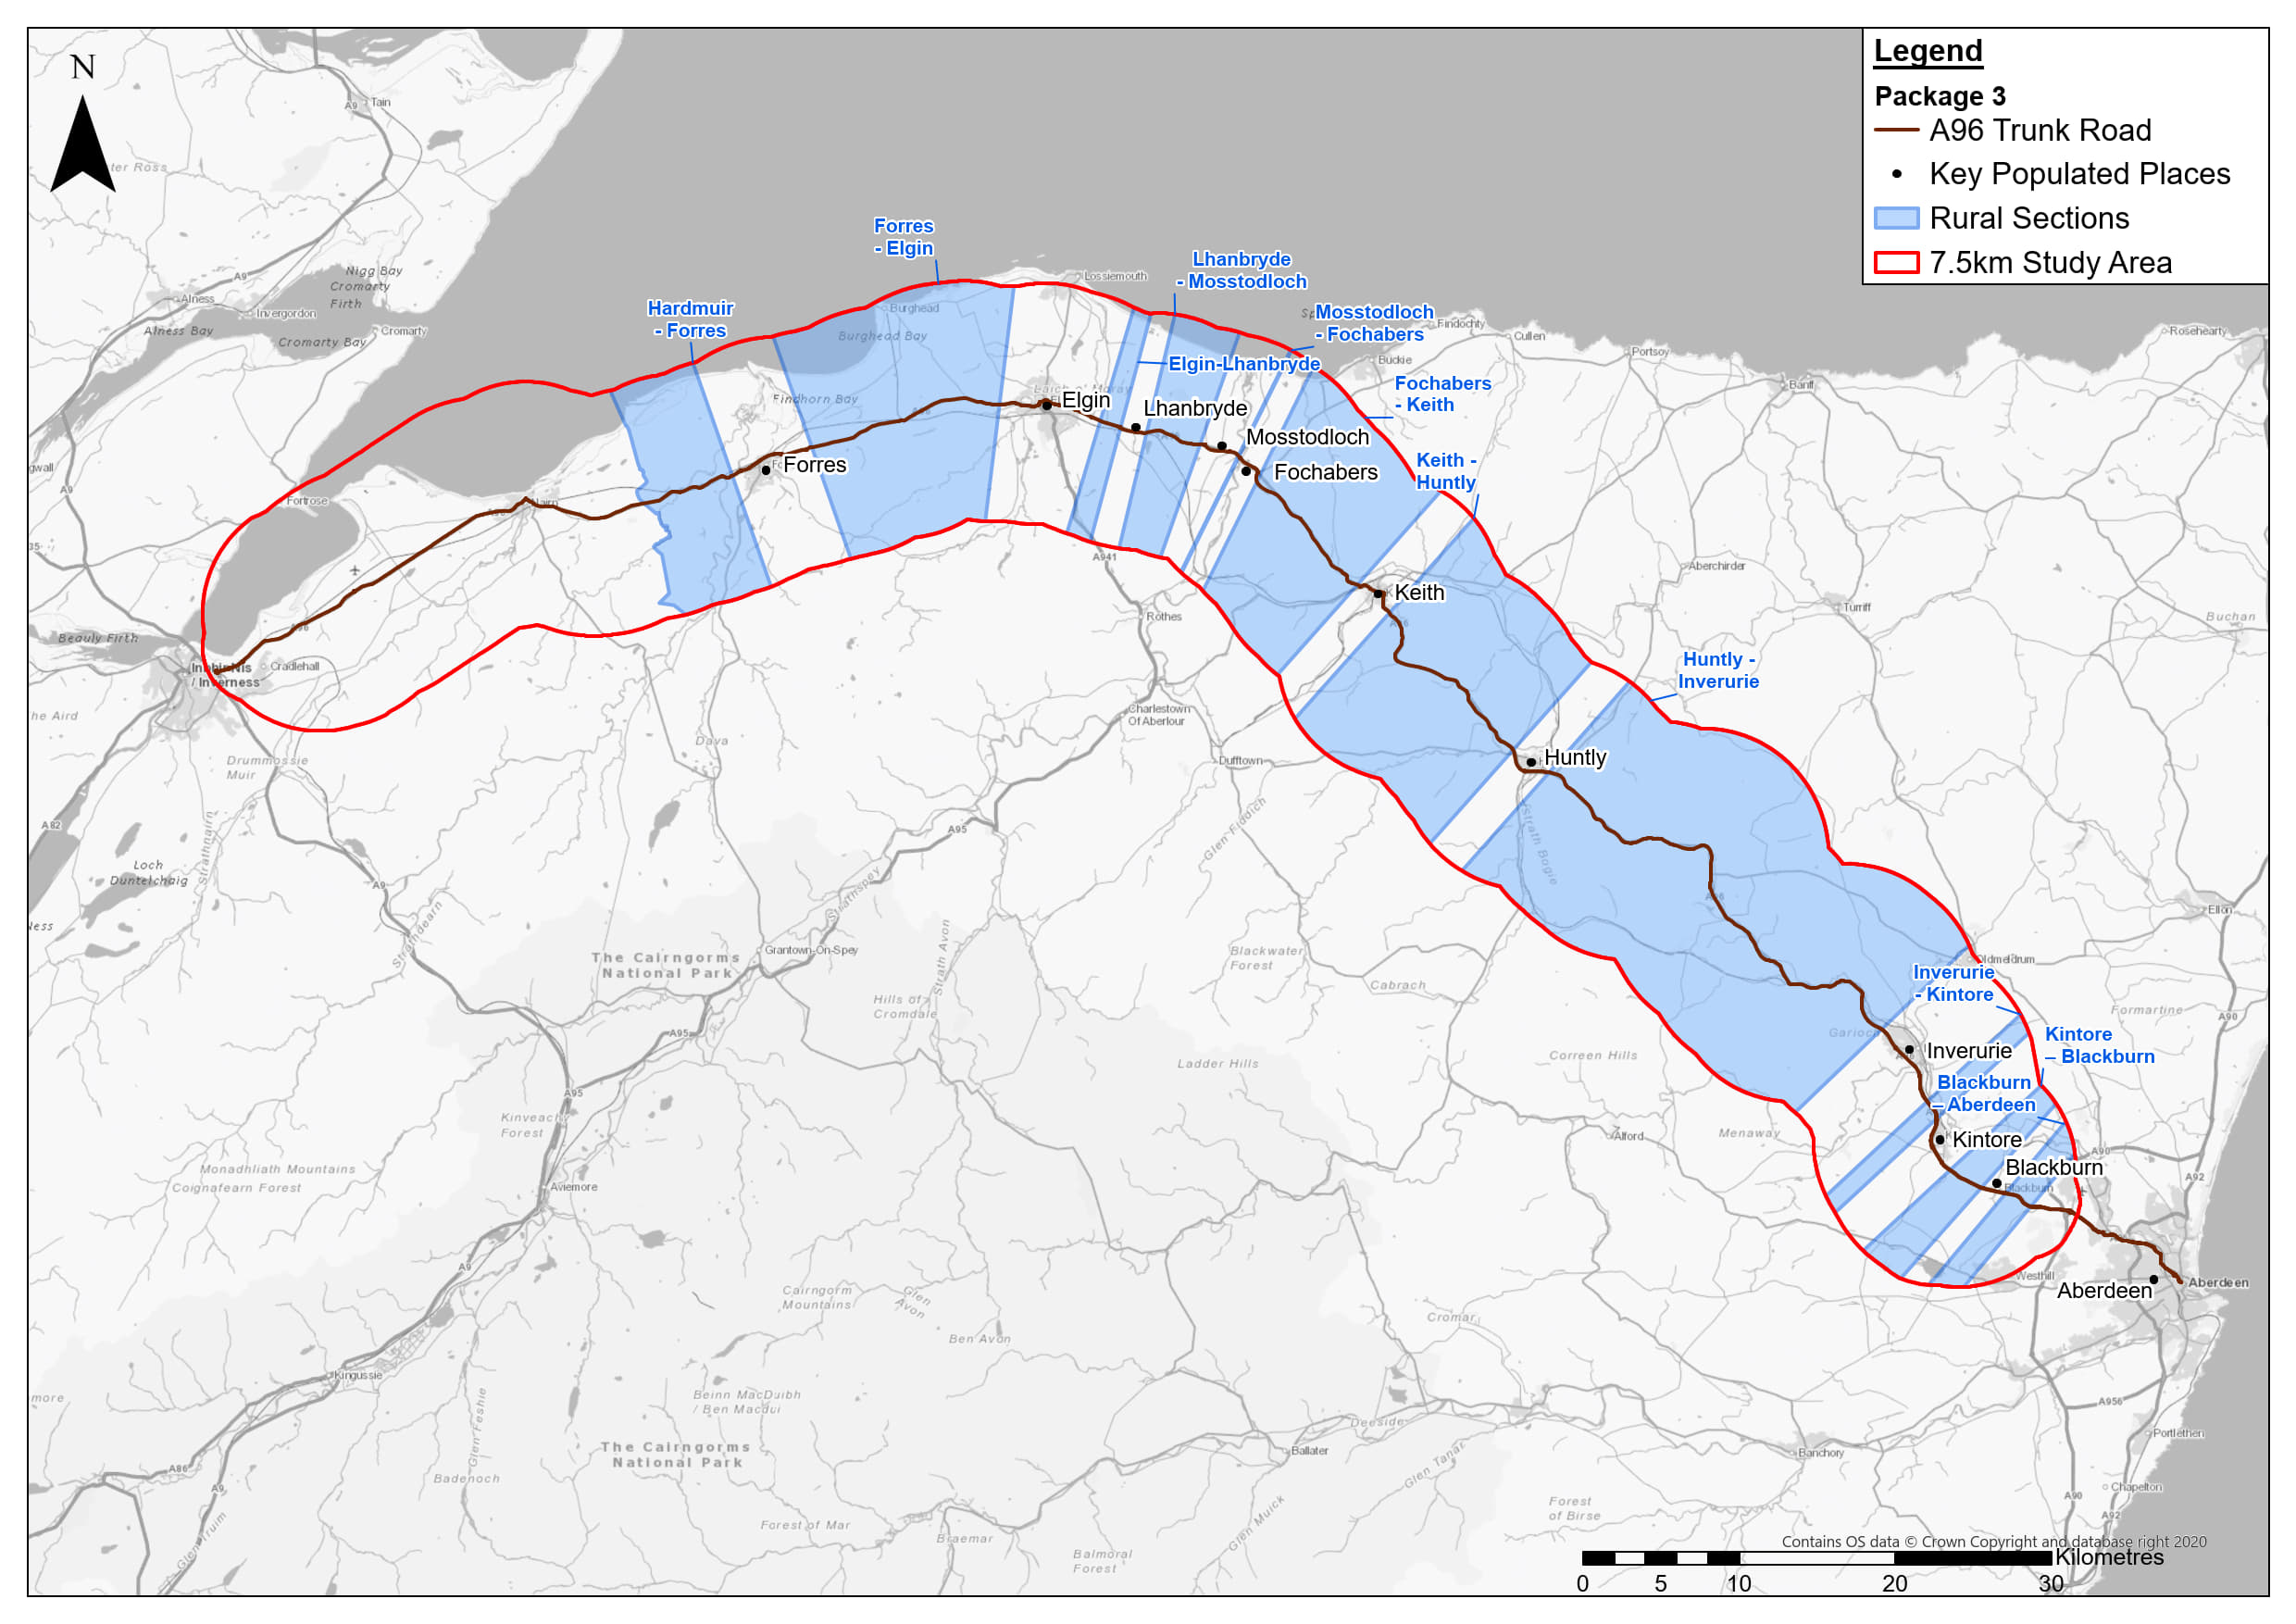
Package 3
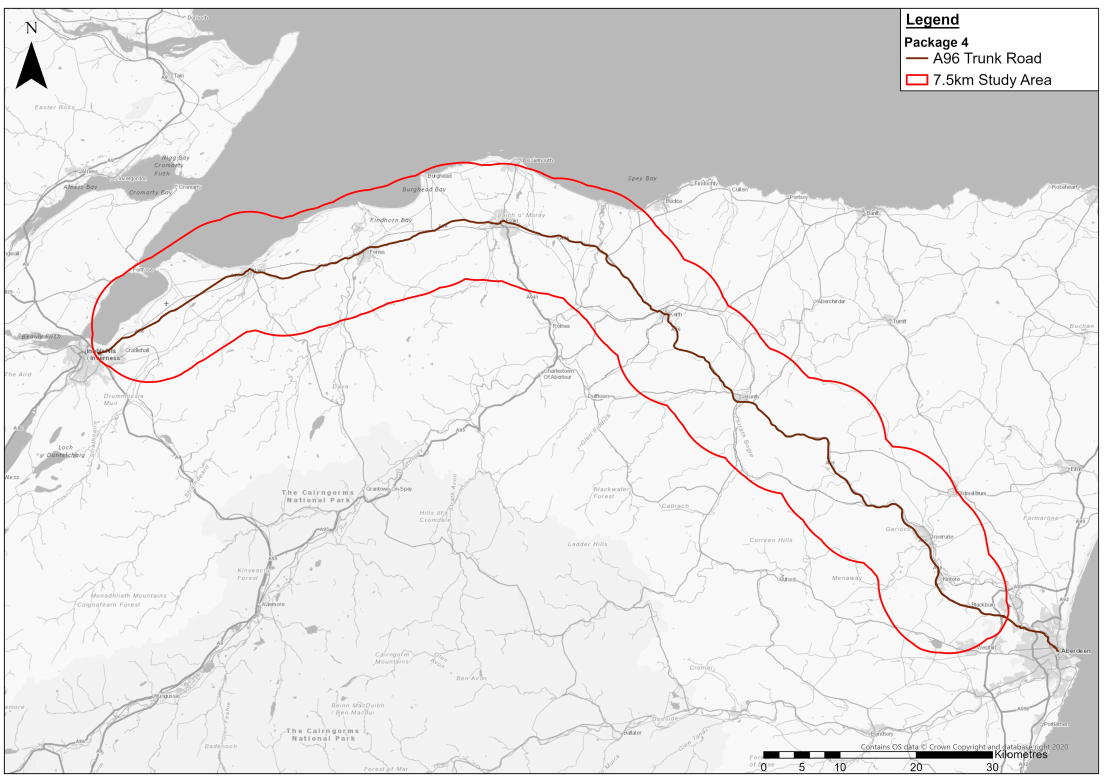
Package 4
Package 5

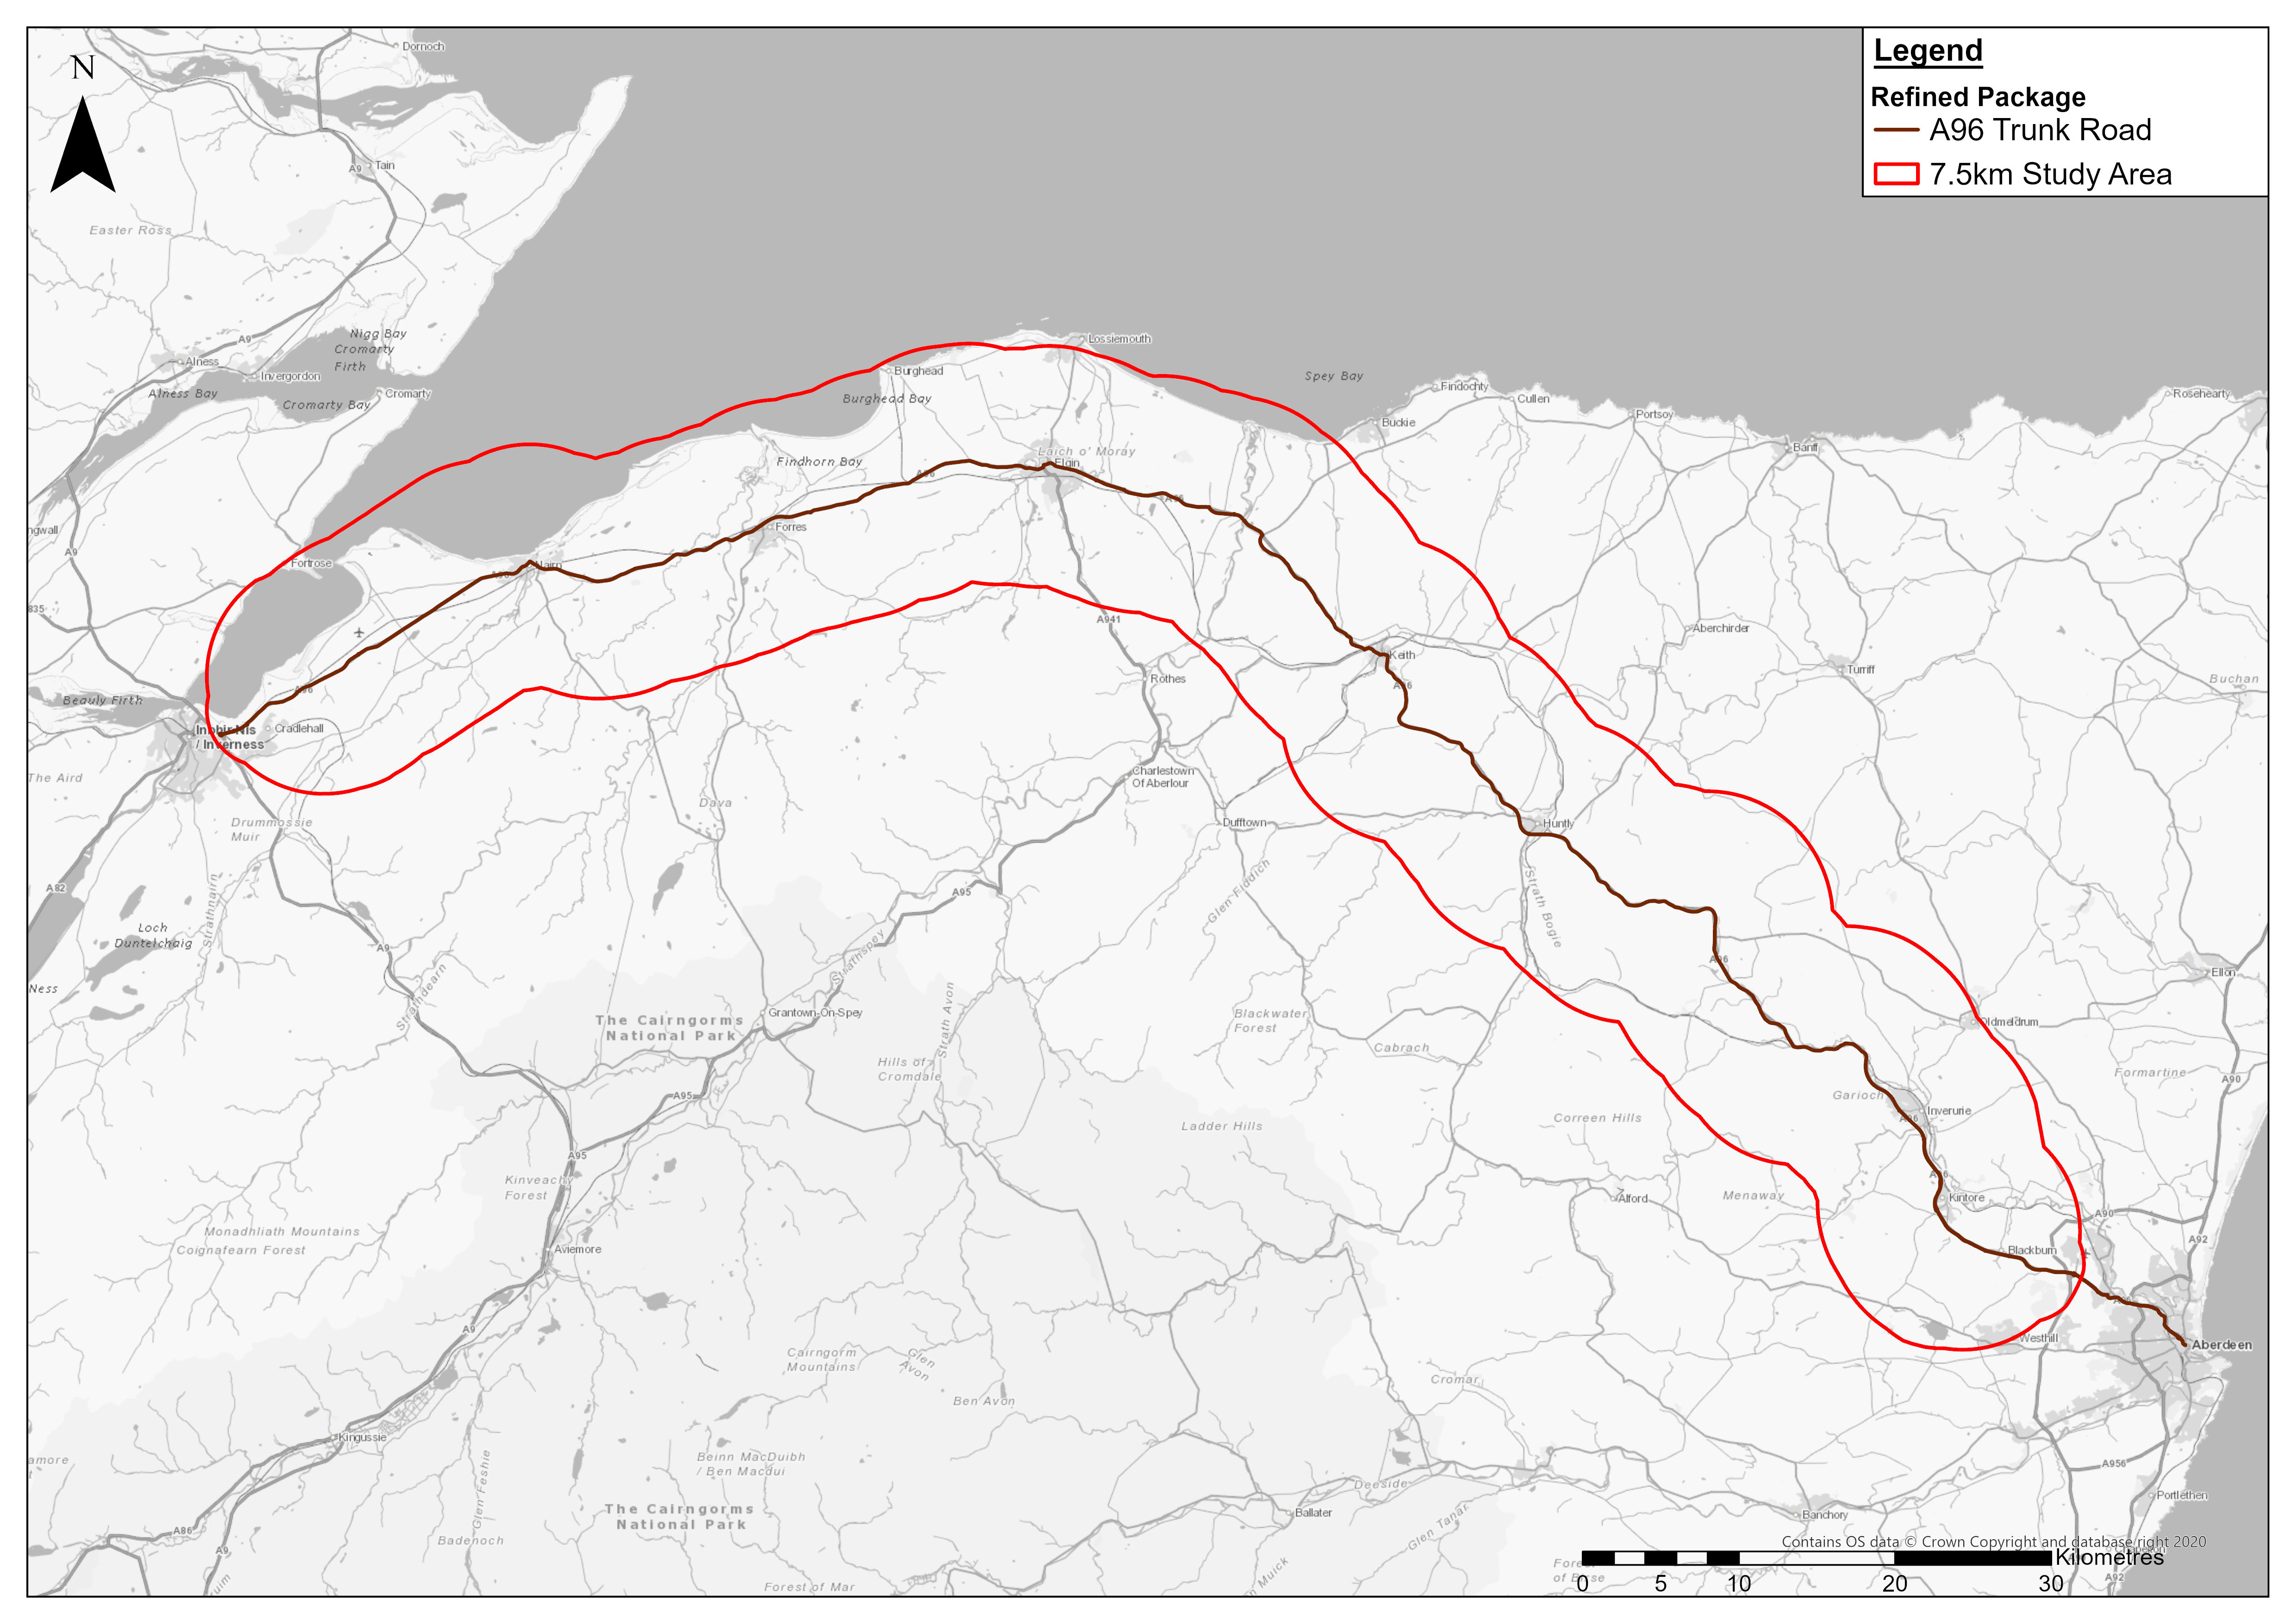
Refined Package
A96 Full Dualling
Package 1
Package 2
Package 3
Package 4
Package 5
Refined Package